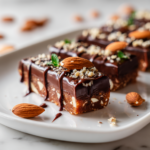
This tart isn’t just about the flavors; it’s about the act of reclaiming childhood favorites with a touch of grown-up finesse. I love how the peanut butter’s richness and the dark chocolate’s depth come together in one decadent, yet approachable slice.
Making this tart feels like a small rebellion—an indulgent treat that doesn’t ask for a fancy restaurant setting. It’s perfect for those evenings when you want something comforting but still want to impress with your DIY skills.
The unsung magic of combining childhood flavors—peanut butter and chocolate—into a sophisticated dessert that balances nostalgia with elegance.
Why this recipe matters to me
- I love how the smell of melting chocolate fills the kitchen, making everyone drool.
- Every time I make this, I get nostalgic for lazy Sunday afternoons.
- There’s a quiet pride in turning childhood favorites into elegant desserts.
- It’s a little messy to make, but always worth the cleanup.
My inspiration behind this tart
- The idea struck me one rainy afternoon when I was craving something sweet and familiar. I had a jar of peanut butter and a bar of dark chocolate sitting on the counter, waiting.
- I wanted to create something that felt both indulgent and comforting, but with a bit of sophistication.
- The process reminded me that simple ingredients—when combined thoughtfully—can become something truly memorable.
Background and fun facts about the ingredients and history
- Inspired by childhood snack combos, but elevated with dark chocolate and creamy peanut butter.
- The crust is reminiscent of classic graham cracker crusts used in American pies.
- Peanut butter and chocolate have a long-standing love affair dating back to the early 20th century.
- This tart balances the richness of the filling with a crisp, buttery crust—a contrast that makes every bite exciting.
Ingredient quirks and tweaks
- Graham crackers: I love their buttery crunch, but digestive biscuits work well for a slightly different flavor—more earthy and warm.
- Peanut Butter: Creamy natural peanut butter is ideal; if you only have chunky, blend it smooth first.
- Dark Chocolate: I prefer 70% cocoa for depth, but milk chocolate can add sweetness—adjust sugar accordingly.
- Cream Cheese: It gives the filling body and a slight tang; swap with mascarpone for extra richness.
- Powdered Sugar: It dissolves easily, making the filling smooth; honey or maple syrup can substitute for a hint of caramel.
Spotlight on Peanut Butter and Dark Chocolate
Dark Chocolate:
- Peanut butter: It’s oily and thick, so whisk it well with cream cheese to loosen it up.
- The flavor intensifies as it bakes—nuttier and richer.
- Choose natural for a deeper, more roasted peanut taste.
Chocolate:
- Dark chocolate: It melts into a glossy, velvety layer that’s both bitter and sweet.
- It can seize if overheated—melt slowly over low heat or in short bursts.
- The aroma is rich and smoky—pay attention to the first crackle of melting.
Substitutions for dietary needs and flavor tweaks
- Dairy-Free: Swap cream cheese with coconut cream—adds a tropical note, but less tang.
- Gluten-Free: Use gluten-free graham crackers or crushed gluten-free cookies for the crust.
- Vegan: Substitute butter with coconut oil and cream cheese with a vegan cream cheese alternative.
- Sugar-Free: Use a sugar substitute like erythritol, but keep an eye on the texture.
- Nut-Free: Use sunflower seed butter instead of peanut butter for allergy-friendly options.
Equipment & Tools
- Food processor: Crush crackers easily
- Double boiler or heatproof bowl over a pot: Gently melt chocolate
- Spatula: Smooth filling and chocolate
- 23cm tart pan: Shape your tart
- Sharp knife: Clean slicing
- Refrigerator: Chill and set
Step-by-step guide to your chocolate peanut butter tart
- Preheat your oven to 175°C (350°F).
- Crush 200g of graham crackers into fine crumbs, then mix with 100g melted butter until evenly coated.
- Press this mixture into a 23cm tart pan, covering the base and sides. Bake for 10 minutes until golden.
- While the crust cools, melt 200g dark chocolate gently over a double boiler, stirring until smooth.
- In a separate bowl, whisk together 250g peanut butter, 150g cream cheese, and 100g powdered sugar until silky.
- Pour the peanut butter filling into the cooled crust, smoothing out the top with a spatula.
- Drizzle the melted chocolate over the filling, creating a marbled effect if desired.
- Chill the tart in the fridge for at least 2 hours, or overnight, to set.
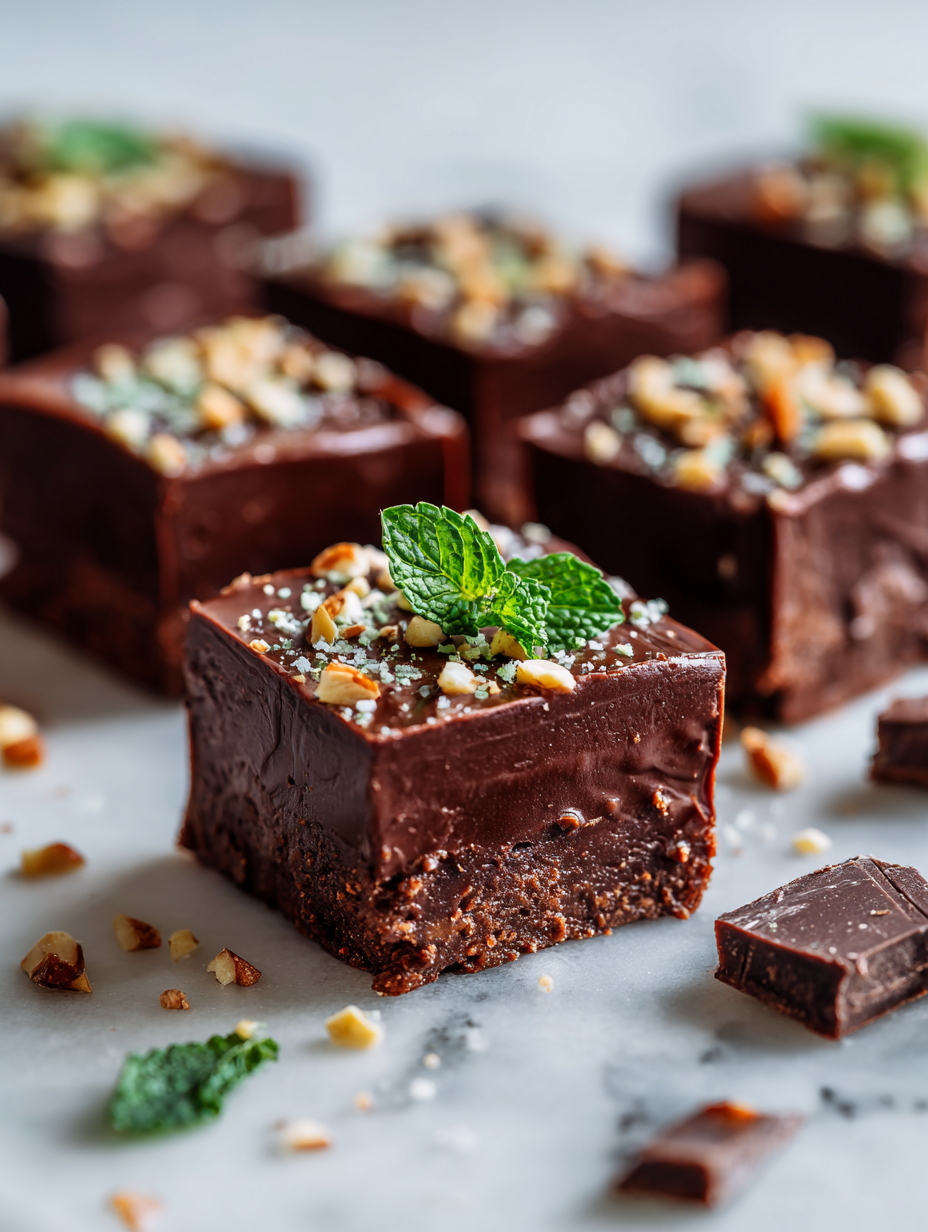
- Before serving, sprinkle with chopped peanuts or chocolate shavings for added texture.
- Slice with a warm knife (dip in hot water first) for clean cuts.
Let the tart chill for at least 2 hours, then bring to room temperature for the best flavor and texture. Decorate just before serving for a crisp finish.
How to Know It’s Done
- Crust is golden and firm.
- Filling is shiny and set, no jiggle.
- Chocolate drizzle is firm and glossy.
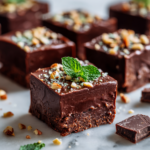
Chocolate Peanut Butter Tart
Ingredients
Equipment
Method
- Preheat your oven to 175°C (350°F). Crush the graham crackers into fine crumbs using a food processor, then transfer to a bowl. Mix the crumbs with melted butter until evenly coated, creating a crumbly dough.
- Press the crumb mixture evenly into a 23cm tart pan, covering the base and sides. Use the back of a spoon or your fingers to smooth it out, then bake for 10 minutes until golden and fragrant. Remove from the oven and let cool slightly.
- While the crust bakes, melt the dark chocolate slowly over a double boiler or in short bursts in the microwave, stirring until smooth and glossy. Set aside to cool slightly.
- In a mixing bowl, whisk together the peanut butter, softened cream cheese, and powdered sugar until the mixture is smooth, creamy, and well combined. This creates a luscious filling that’s easy to spread.
- Pour the peanut butter filling into the cooled crust, spreading it out evenly with a spatula. Smooth the top for a clean finish.
- Drizzle the melted chocolate over the peanut butter layer, using a spoon or piping bag to create a marbled or even finish. Allow the chocolate to set for about 30 minutes at room temperature or 15 minutes in the fridge.
- Place the tart in the refrigerator for at least 2 hours or overnight to fully set and develop flavor. When ready to serve, sprinkle with chopped peanuts or chocolate shavings for added texture and visual appeal.
- Before slicing, dip a sharp knife in hot water and wipe dry to ensure clean cuts. Slice the tart into wedges and serve chilled or at room temperature, enjoying the rich, velvety layers with a crisp crust.
Cooking tips & tricks
- Use room-temperature ingredients for a smoother, more cohesive filling.
- Chill the crust before adding filling to prevent sogginess.
- Melt chocolate slowly to avoid burning and achieve a glossy finish.
- Use a warm knife for clean slices, dipping it in hot water.
- For extra flavor, add a pinch of flaky sea salt on top before chilling.
Common mistakes and how to fix them
- FORGOT TO CHILL? — Re-freeze the tart for 30 mins to firm up the filling.
- DUMPED TOO MUCH CHOCOLATE? — Use a spoon to spread it evenly, then chill again.
- OVER-TORCHED CHOCOLATE? — Melt with a splash of warm cream to smooth out.
- CRACKED TOP? — Lightly warm and re-smooth with a spatula.
Quick kitchen fixes
- When the chocolate isn’t glossy, add a tiny bit of coconut oil. Shimmer guaranteed.
- Splash a little warm milk into the melted chocolate if it’s too thick to spread.
- Patch a cracked crust by pressing in extra crumbs and chilling.
- Shield the edges of the tart with foil if they brown too quickly.
- When in doubt, chill it longer—better to have a firm set than a sloppy mess.
Make-ahead and storage tips
- Prepare the crust and filling a day ahead; keep covered in the fridge.
- The tart can be stored in an airtight container for up to 3 days; flavors deepen over time.
- Freezing is possible for up to a month—wrap tightly in plastic and foil.
- Reheat slices briefly in the microwave if the peanut butter feels too firm, just 10-15 seconds.
10 Practical Q&As for the Chocolate Peanut Butter Tart
1. Can I use a different crust?
Use a simple graham cracker or digestive biscuit crust, crushed fine and mixed with melted butter. It’s straightforward and sets a sturdy base.
2. How do I get a smooth filling?
The filling needs to be silky and smooth, so whisk the peanut butter with cream cheese or mascarpone to help it set better.
3. How long should I chill it?
Chill the tart for at least 2 hours or overnight; this allows the flavors to meld and the filling to firm up.
4. What kind of peanut butter is best?
Use good-quality peanut butter—natural, creamy, and not too oily—for the best flavor and texture.
5. How do I decorate the tart?
Garnish with chopped peanuts, chocolate shavings, or a drizzle of caramel to add texture and visual appeal.
6. Can I reheat leftovers?
Reheat the slices briefly in the microwave if you want the peanut butter to be gooey again.
7. How long does it keep?
Keep the tart refrigerated, covered, for up to 3 days. It may get softer but remains delicious.
8. Should I add salt?
Add a pinch of flaky sea salt on top before serving for a flavor contrast that enhances the sweetness.
9. Why does ingredient temperature matter?
Use fresh, room-temperature ingredients for smoother mixing and a more cohesive filling.
10. Can I freeze this tart?
You can freeze the tart for up to a month; thaw it in the fridge before serving.
Sharing a slice of this tart always feels like a little celebration. It’s simple enough for a weekday but special enough for weekends.
Sometimes, I think it’s the texture—crust crunchy, filling velvety—that makes it stick in my memory. No matter the occasion, it’s a dessert that’s hard to forget.

Hi, I’m Charlotte Hayes, the creator and storyteller behind Lost in the Aroma. If you’ve ever closed your eyes while something simmered on the stove just to take in the scent, then you already understand what this space is about. For me, aroma is memory. It is emotion. It is the first sign that something beautiful is about to be shared. Lost in the Aroma is where I bring together recipes, sensory storytelling, and my lifelong love for food. I am so glad you’re here.

Leave a Reply